
Linxu Deploy 自建服务器指北(一):系统安装
前不久把博客从云服务器搬到
COS上,因为学生机 1Mbps 的带宽对图床服务来说实在是捉襟见肘,所以图床服务也从 North 一并迁移了。对象存储托管静态网页是个不错的选择,但若想部署个接口什么的就无能为力了。之前使用 Github 学生认证体验了下 Azure 的 云函数,不得不说结合宇宙第一 IDE(doge)Visual Studio开发起来太流畅了,但 Azure 的问题在于它的价格实在是太贵了(好吧这实际上是我的问题)。于是考虑国内有无类似的 Serverless 服务,转了一圈感觉国内云厂商普遍对 .NET 的支持不太好而且价格偏贵,所以干脆自建服务器 + 免费 FRP 将白嫖进行到底!
系统搭建
对我这种偶尔想写个 API 玩玩的来说,县城撕裂者 5995WX + RTX4090 的配置显得略微有点浪费了。那有没有搭建简单、维护方便、性能强劲、价格低廉(最好能完全白嫖)、省电、噪音小的方案呢?如果你也有类似的想法,这边建议您去庙里许愿呢亲亲

想到几年前学 Linux 时买的树莓派,虽然性价比一般但文档和论坛是真的丰富,拿来做服务器性能不太够而且噪音实在是太大了……于是吃了好几年灰最后忍痛出掉(谁能想到这玩意涨价这么离谱,我原价出的以为赚了结果两个月后直接翻了一倍)。然后想起来我好像有个闲置已久的旧手机小米 8 SE,怎么感觉完全符合我的要求,而且印象中 Android 好像跟 Linux 有点关系啊,那如果能直接将手机刷成 Linux 系统或者虚拟化不是直接白嫖!
| CPU | CPU 核心数 | CPU 频率 | GPU | RAM/ROM |
|---|---|---|---|---|
| 高通骁龙 710 | 8 | 2.2 GHz | 高通 Adreno616 | 4GB(LPDDR4X 双通道)/64GB(eMMC 5.1) |
于是在小小的互联网上挖呀挖呀挖,找到了以下几种方案
- 原生 Linux 系统
- 内核共享
- 虚拟化/其它
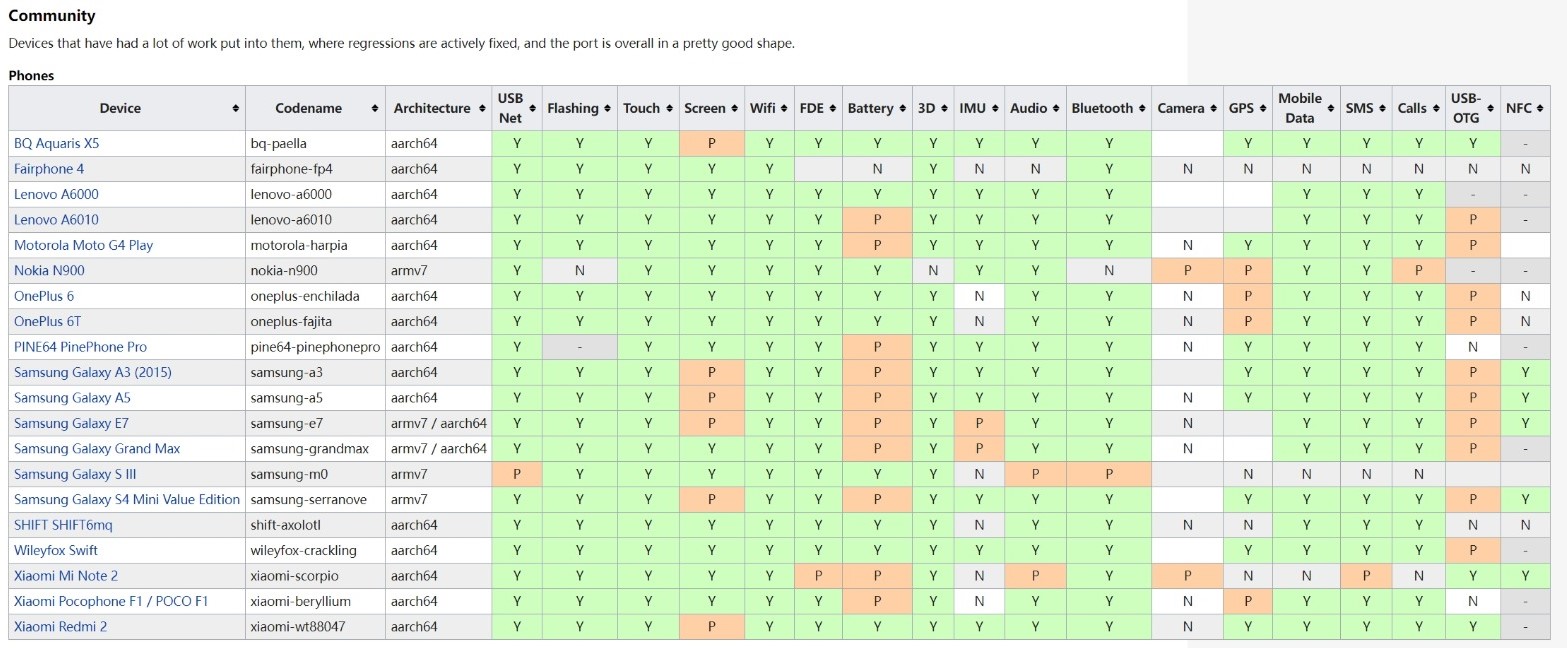
postmarketOS & Ubuntu Touch
起初考虑原生 Linux 系统,就性能上来说原生 Linux 肯定是最优选择,但仔细查看后发现 postmarketOS 和 Ubuntu Touch 均没有适配 Mi 8 SE,于是含泪 pass
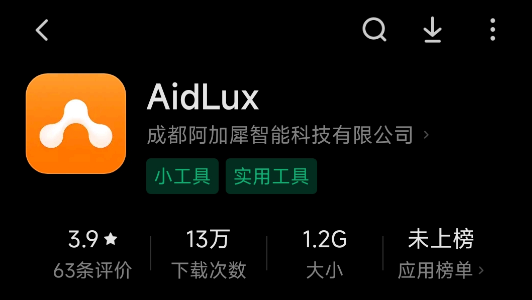
AidLux
AidLux 的安装相当简单,应用市场直接安装即可
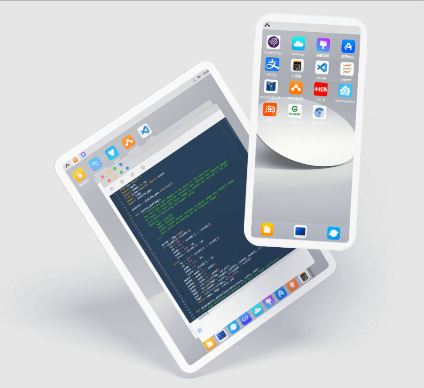
安装完成后打开软件会下载需要的组件,全程傻瓜式安装。AidLux 的优点还是很明显的
-
安装简单,自带桌面环境
-
可在安卓系统和 Linux 间自由切换,非虚拟机模式(原生、稳定)
-
内置当前主流 AI 框架,开箱即用

-
通过 AidLite API 提供 CPU + GPU + NPU 智能加速 blabla……更多内容可以前往 AidLux 官网.查看
简单来说,如果你是用来学习人工智能 or 懒得折腾 or 动手能力不强 or 只想接触下 Linux 玩玩,AidLux 是个很不错的选择。但不知道是笔者手机配置低还是其它原因,使用 MobaXterm 连接 AidLux 时命令行很卡,而且笔者通常只跑一些 ASP.NET Core 之类的后端程序,AidLux 于我而言还是太臃肿了,遂 pass
Termux
作为 Android 中开箱即用的模拟 Linux 环境,Termux 的优点是很明显的:轻量、稳定、无需 ROOT 以及完善的社区支持等等,本质上是一个带完整包管理器的终端模拟器。在搜素 Termux 的过程中,有篇 博文 的评论区提到了安卓 10 对 Termux 造成的不良影响
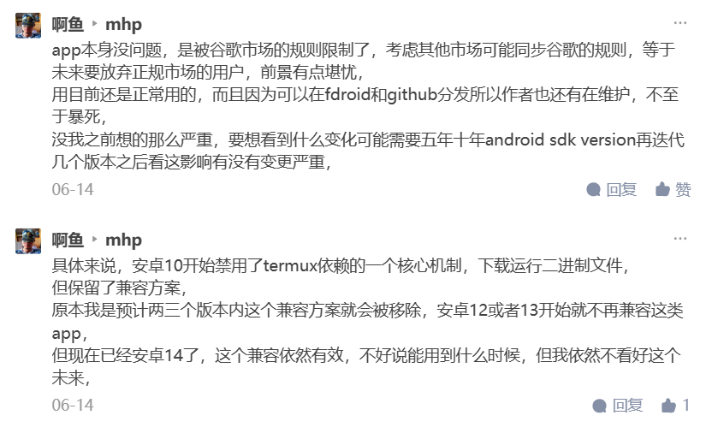
我的理解是 Termux 的正常工作需要下载运行二进制文件,但目前安卓 10 以及谷歌市场限制了这一行为(类似于现在应用定位时必须在状态栏显示、Google Play 限制上架应用行为等),而其它品牌手机(如小米)的定制系统及应用市场未来也可能实行相关举措。尽管安卓目前保留了兼容方案,但 Termux 未来发展堪忧

但目前 Termux 还是可以正常使用的,未来也可以通过不升级的方式继续使用,笔者考虑再三还是决定使用 Linux Deploy,所以本文将主要介绍 Linux Deploy 的安装流程
Linux Deploy
This application is open source software for quick and easy installation of the operating system (OS) GNU/Linux on your Android device.
The application creates a disk image or a directory on a flash card or uses a partition or RAM, mounts it and installs an OS distribution. Applications of the new system are run in a chroot environment and working together with the Android platform. All changes made on the device are reversible, i.e. the application and components can be removed completely. Installation of a distribution is done by downloading files from official mirrors online over the internet. The application can run better with superuser rights (ROOT). [来自 Linux Deploy Github Repository]
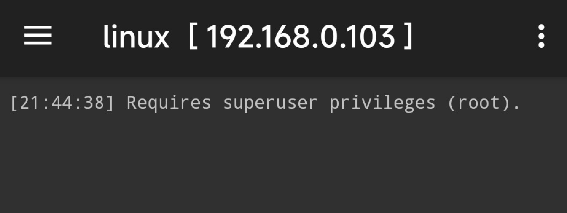
简单来说 Linux Deploy 是一个能帮助我们快速安装 Linux 的 APP,其安装的 Linux 不是原生运行而是运行在 chroot 环境中。新系统安装所需的文件来自镜像网站,此外使用 ROOT 权限可以让 Linux Deploy 更好地运行(实际上必须要获取 ROOT 权限,否则会报如下错误)
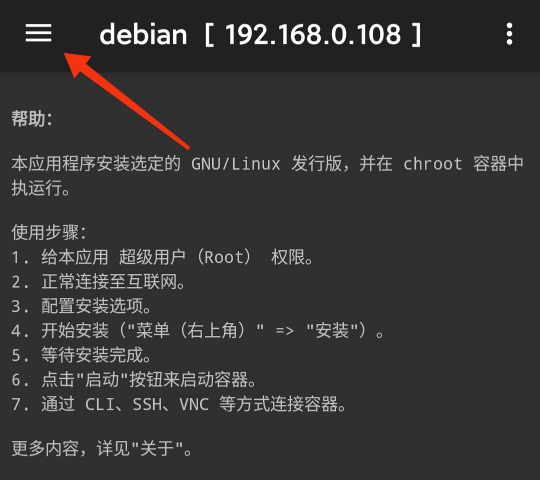
Linux Deploy 下 Linux 环境的搭建分为如下步骤
- 获取系统 ROOT 权限
- 修改 Linux Deploy 配置
- 在 Linux Deploy 中添加 Linux 配置文件
- 安装 Linux 发行版
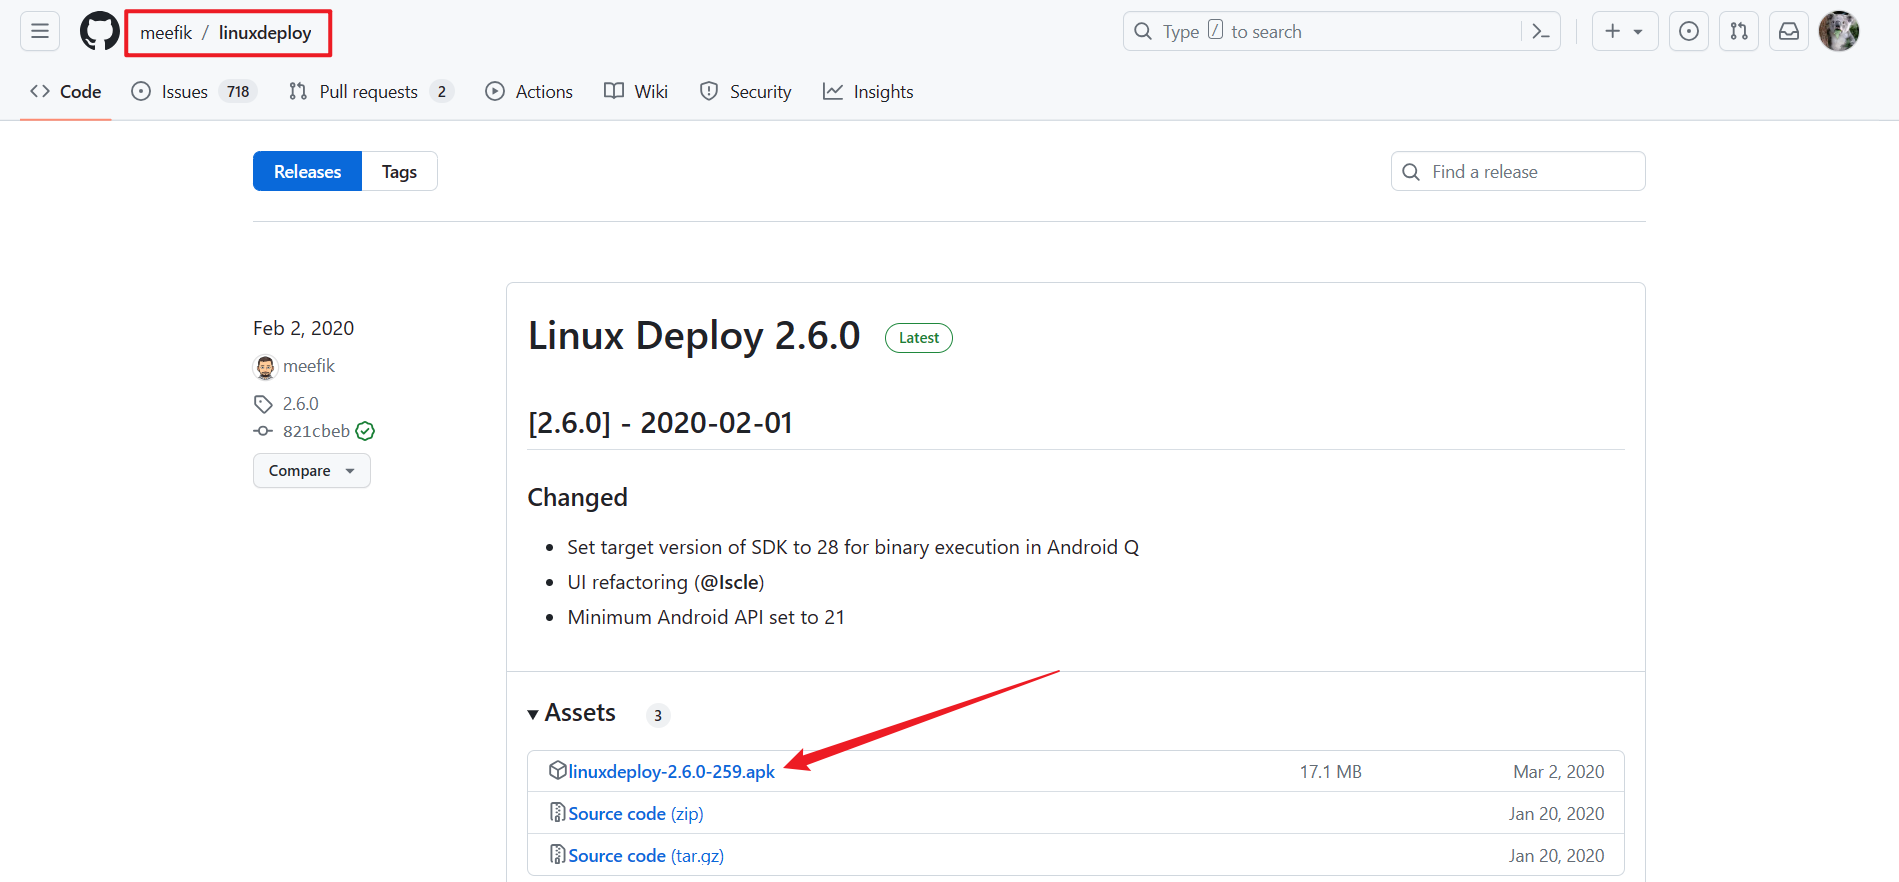
下面将详细介绍安装流程,其中 ROOT 权限的获取参照 教程,这里不再赘述。接下来前往 Github 仓库 或 蓝奏云(密码:8sdx) 下载 Linux Deploy 安装包
此处提供的 2.6.0 版本安装后无需再安装 BusyBox
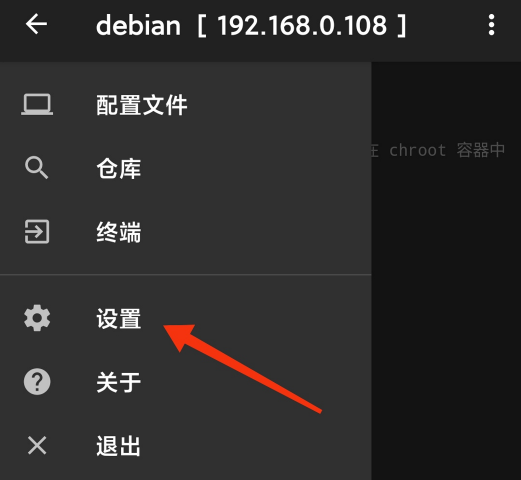
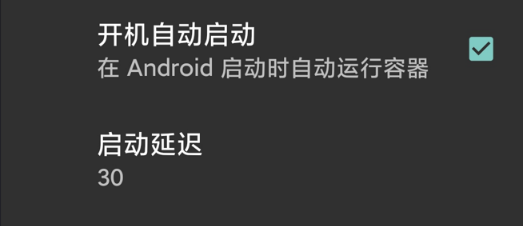
打开 Linux Deploy,点击左上角设置
建议勾选 锁定Wi-Fi 、CPU唤醒 和 开机自动启动
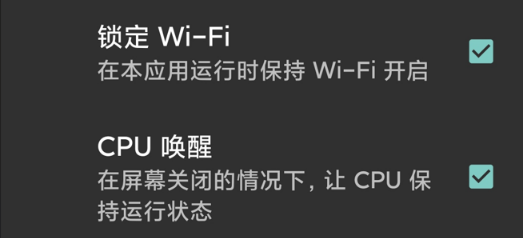
注意:
- 锁定 Wi-Fi 是为阻止某些系统在网络空闲、锁屏等情况下关闭 Wi-Fi 等行为,手动关闭 Wi-Fi 无法阻止
- CPU 唤醒功能并 不能保证其满负荷运行,实测 MIUI 在锁屏时会限制 CPU 频率,后文将给出解决方案
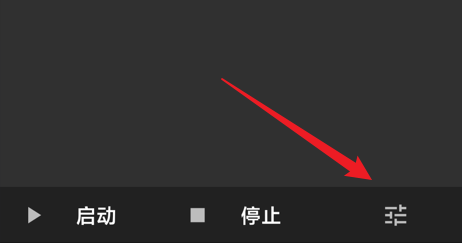
返回应用主页面,点击右下角配置
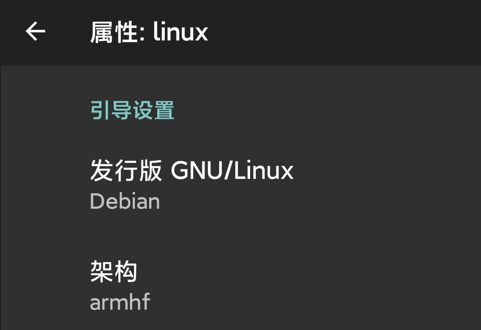
前面的设置流程是用于 配置 Linux Deploy 容器,此处是用于 引导 Linux 系统安装
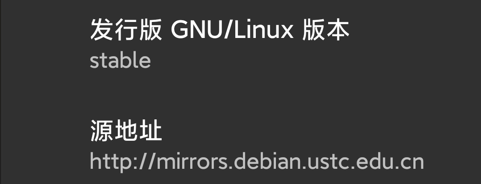
选择 Linux 发行版和硬件架构,这里以 Debian 为例
选择 Debian 发行版本(Debian 发行版本的代号见下表,详细内容请前往 Debian 官网)
| 版本 | 代号 | 备注 |
|---|---|---|
| 下一代 Debian 正式发行版 | trixie | 测试(testing)版,发布日期尚未确定 |
| 12 | bookworm | 当前的”稳定(stable)“版 |
| 11 | bullseye | 当前的”旧的稳定(oldstable)“版 |
| 10 | buster | 当前的”更旧的稳定(oldoldstable)“版 |
| 9 | stretch | 已存档的版本 |
| 8 | jessie | 已存档的版本 |
| 7 | wheezy | 被淘汰的稳定版 |
| 6.0 | squeeze | 被淘汰的稳定版 |
| 5.0 | lenny | 被淘汰的稳定版 |
| 4.0 | etch | 被淘汰的稳定版 |
| 3.1 | sarge | 被淘汰的稳定版 |
| 3.0 | woody | 被淘汰的稳定版 |
| 2.2 | potato | 被淘汰的稳定版 |
| 2.1 | slink | 被淘汰的稳定版 |
| 2.0 | hamm | 被淘汰的稳定版 |
注意:testing、stable、oldstable 和 oldoldstable 会 随着 Debian 的发行而变化,此教程发布时 stable 版本对应的为 Debian 12
Debian 官方源访问速度很慢,下表列出了中国地区的 镜像源
| 地区 | 镜像源 | 硬件架构 |
|---|---|---|
| 中国大陆 | mirror.bjtu.edu.cn/debian | amd64 arm64 armel armhf i386 mips mips64el mipsel ppc64el s390x |
| mirror.nju.edu.cn/debian | amd64 arm64 armel armhf i386 mips mips64el mipsel ppc64el s390x | |
| mirrors.163.com/debian | amd64 arm64 i386 mips64el ppc64el | |
| mirrors.bfsu.edu.cn/debian | amd64 arm64 armel armhf i386 mips mips64el mipsel ppc64el s390x | |
| mirrors.hit.edu.cn/debian | amd64 arm64 armel armhf i386 mips mips64el mipsel ppc64el s390x | |
| mirror.sjtu.edu.cn/debian | amd64 arm64 armel armhf i386 mips mips64el mipsel ppc64el s390x | |
| mirrors.neusoft.edu.cn/debian | amd64 arm64 armel armhf i386 mips mips64el mipsel ppc64el s390x | |
| mirrors.tuna.tsinghua.edu.cn/debian | amd64 arm64 armel armhf i386 mips mips64el mipsel ppc64el s390x | |
| mirrors.ustc.edu.cn/debian | amd64 arm64 armel armhf i386 mips mips64el mipsel ppc64el s390x | |
| 台湾省 | ftp.tw.debian.org/debian | amd64 arm64 armel armhf i386 mips mips64el mipsel ppc64el s390x |
| debian.csie.ntu.edu.tw/debian | amd64 arm64 armel armhf i386 mips mips64el mipsel ppc64el s390x | |
| debian.cs.nycu.edu.tw/debian | amd64 arm64 armel armhf i386 mips mips64el mipsel ppc64el s390x | |
| opensource.nchc.org.tw/debian | amd64 arm64 armel armhf i386 mips mips64el mipsel ppc64el s390x | |
| tw1.mirror.blendbyte.net/debian | amd64 arm64 armel armhf i386 mips mips64el mipsel ppc64el s390x | |
| 香港 | ftp.hk.debian.org/debian | amd64 arm64 armel armhf i386 mips mips64el mipsel ppc64el s390x |
| mirror.xtom.com.hk/debian | amd64 arm64 armel armhf i386 mips mips64el mipsel ppc64el s390x |
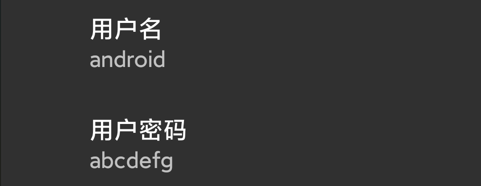
设置 Debian 用户名和用户密码
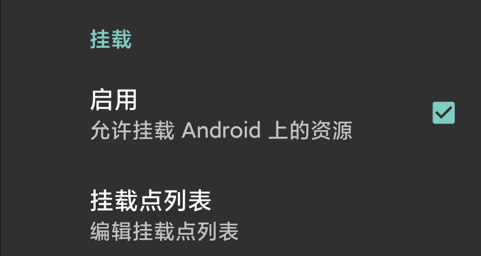
建议勾选启用挂载,这样即可直接在 Linux 中对 Android 分区进行修改
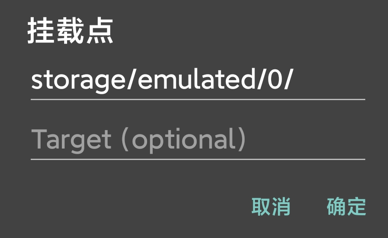
点击挂载点列表 > 右上角添加,输入挂载路径 storage/emulated/0/,点击确定
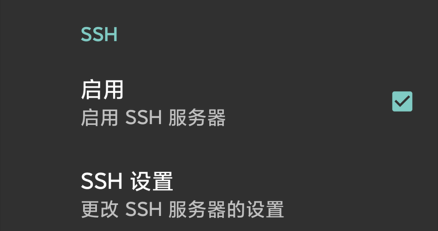
勾选启用 ssh 服务器
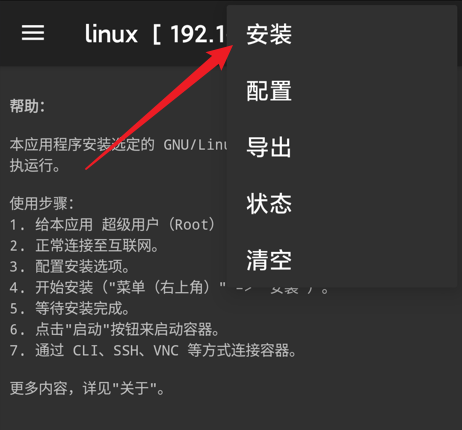
返回主页面,点击右上角 > 安装
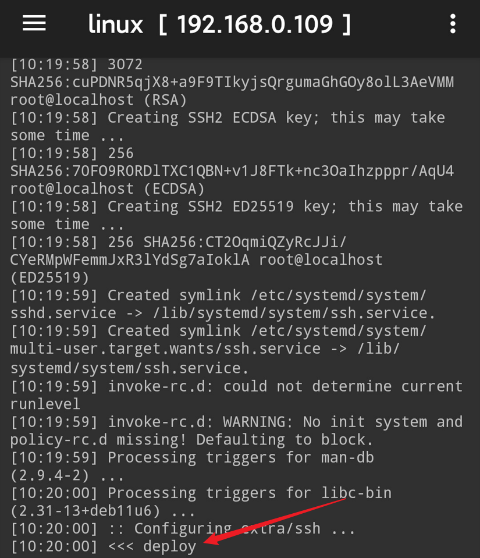
控制台输出 << deploy 代表安装完成
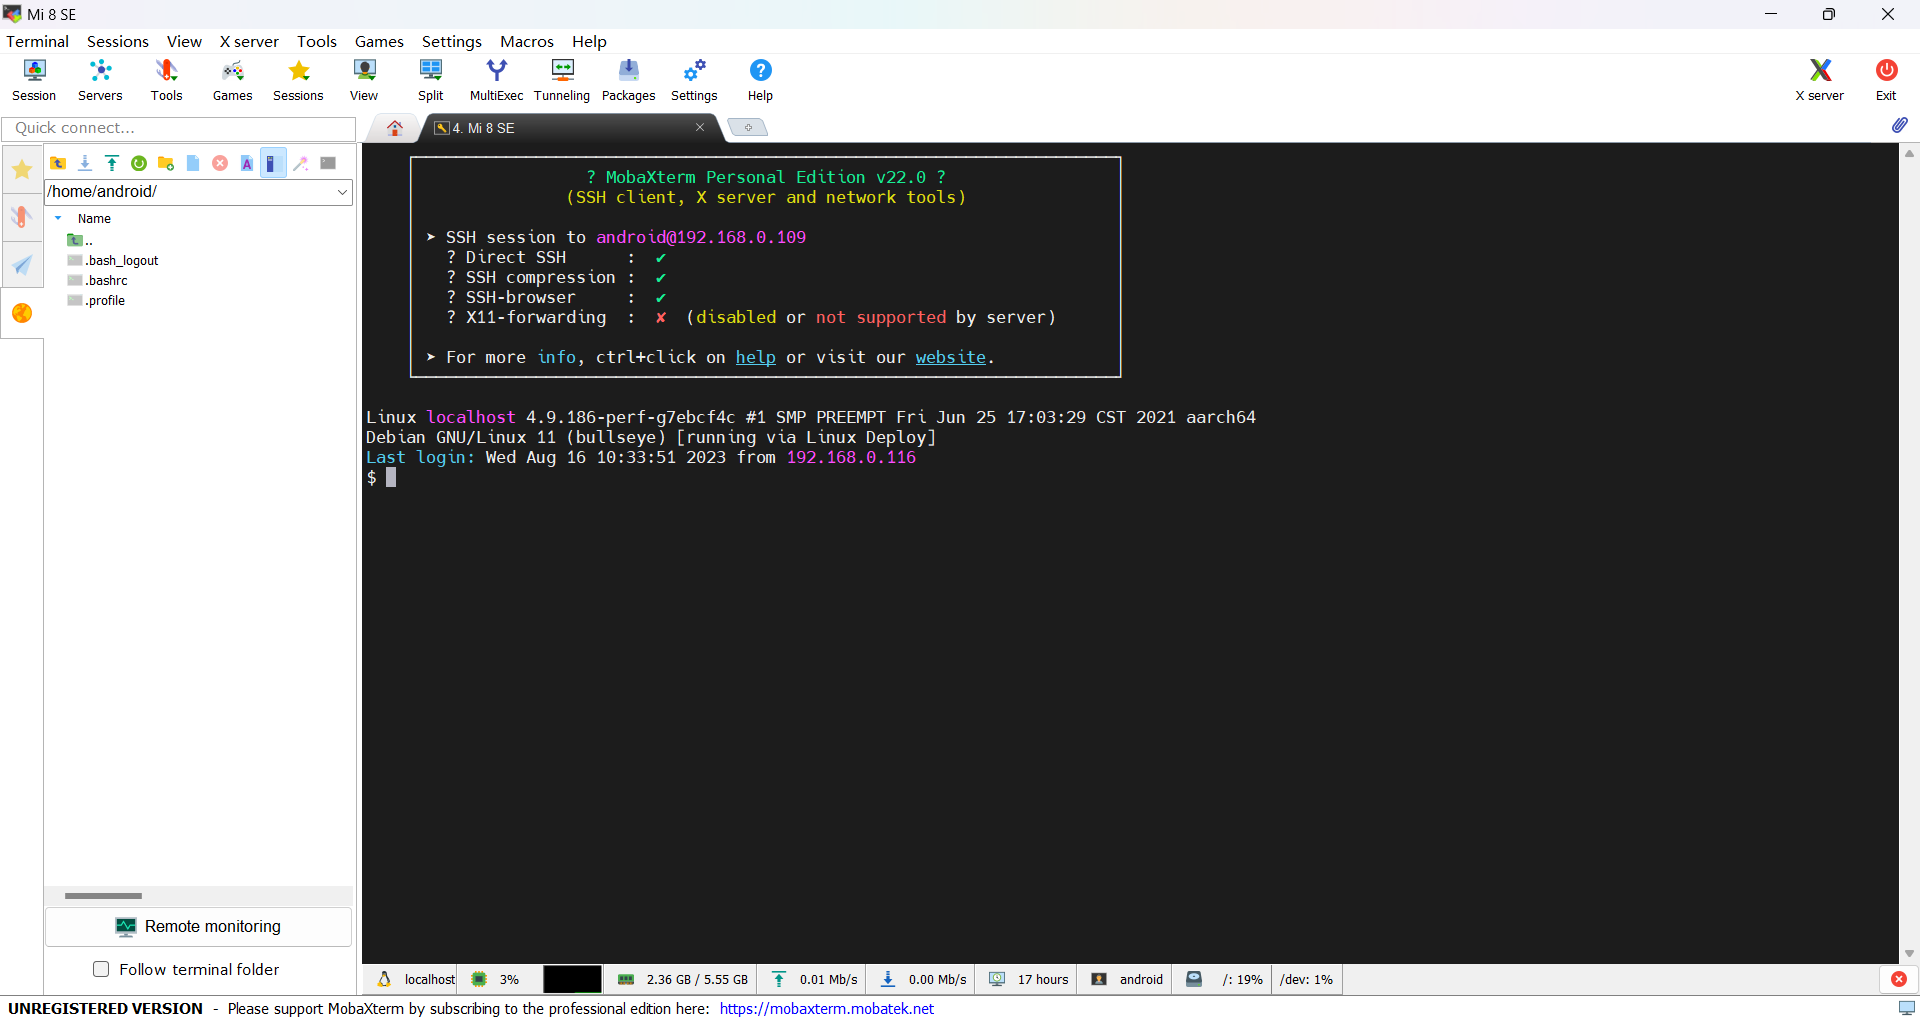
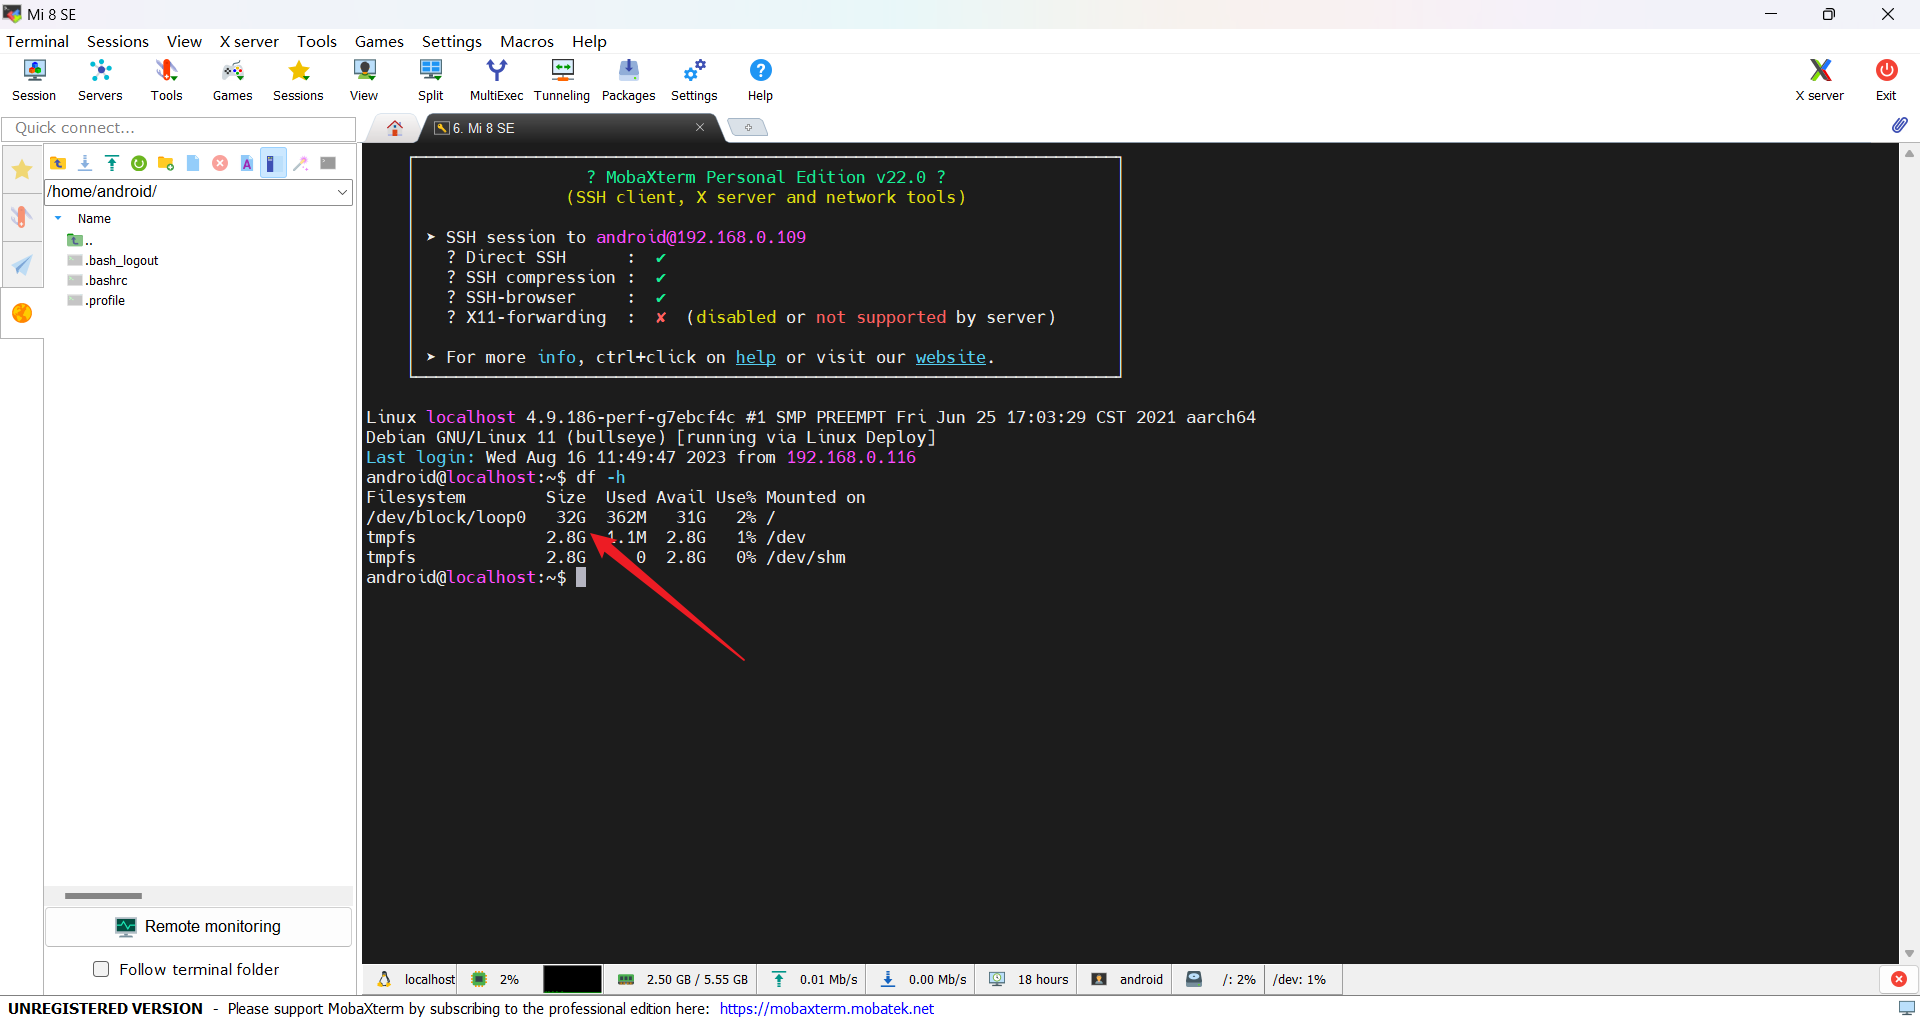
使用 ssh 工具连接系统,这里使用 MobaXerm
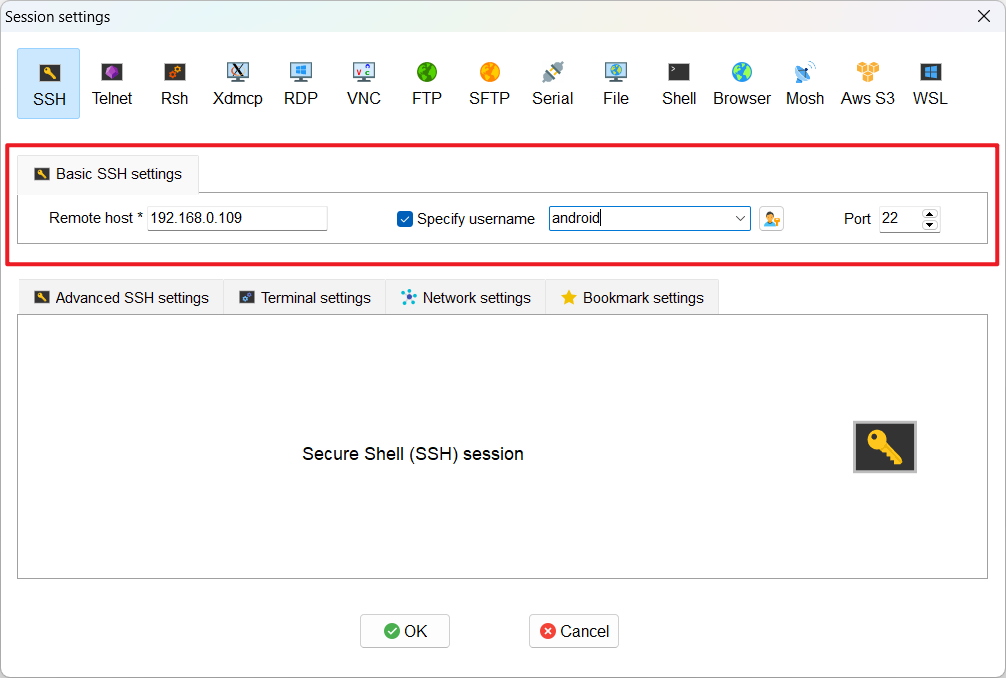
点击 OK > 输入用户密码后即可登录
系统配置
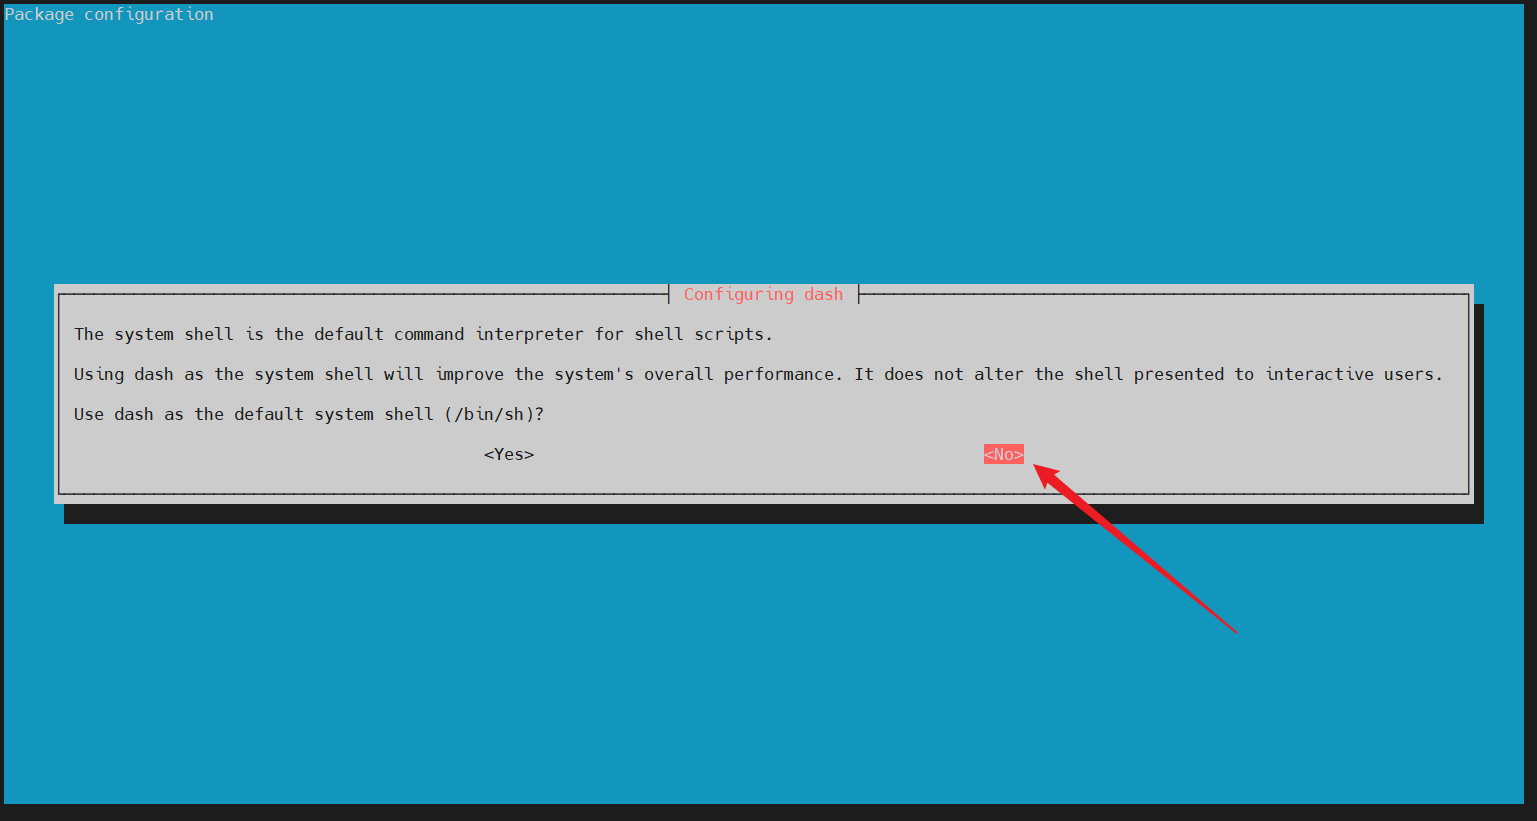
dash 转 bash
Debian 默认的 shell 为 dash,用起来不习惯的可以设置为 bash,首先将 /bin/sh 指向 dash 的符号链接重定向到 bash
1 | sudo dpkg-reconfigure dash |
在弹出的对话框界面中选择 No > 回车
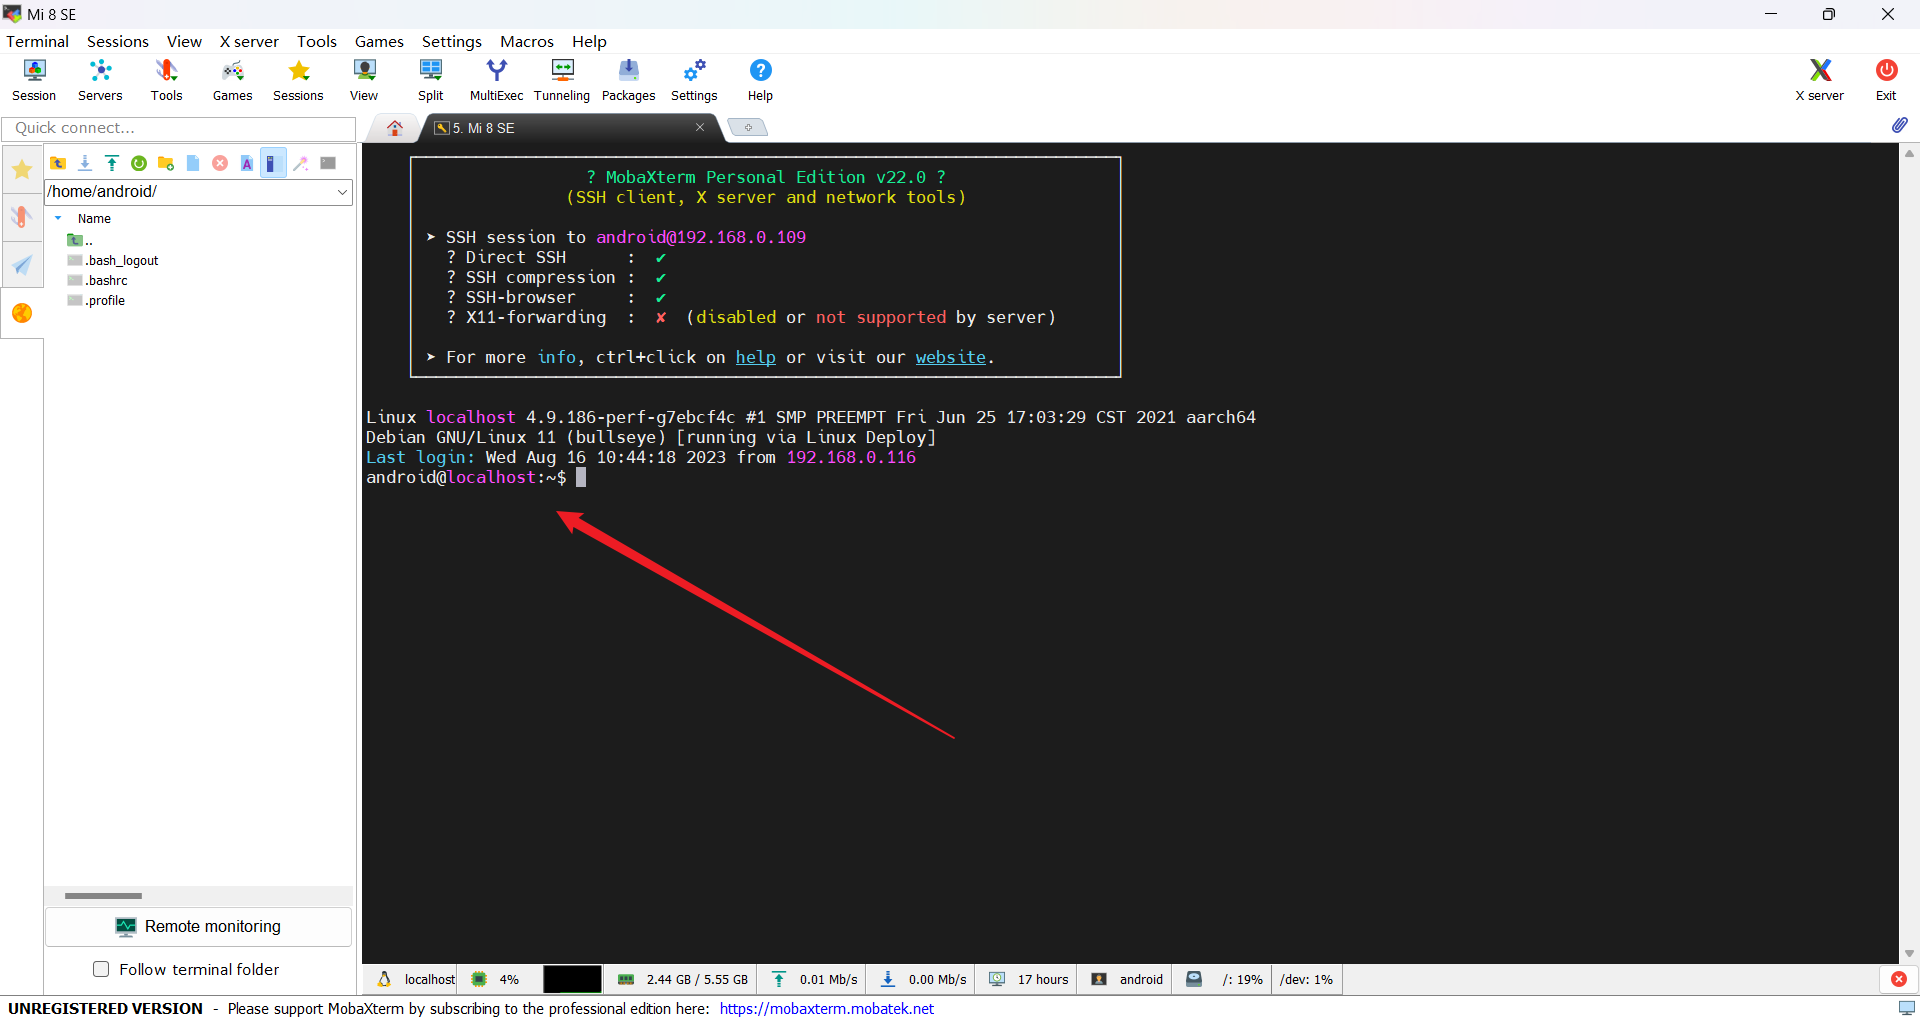
新建 ssh 终端
磁盘扩容
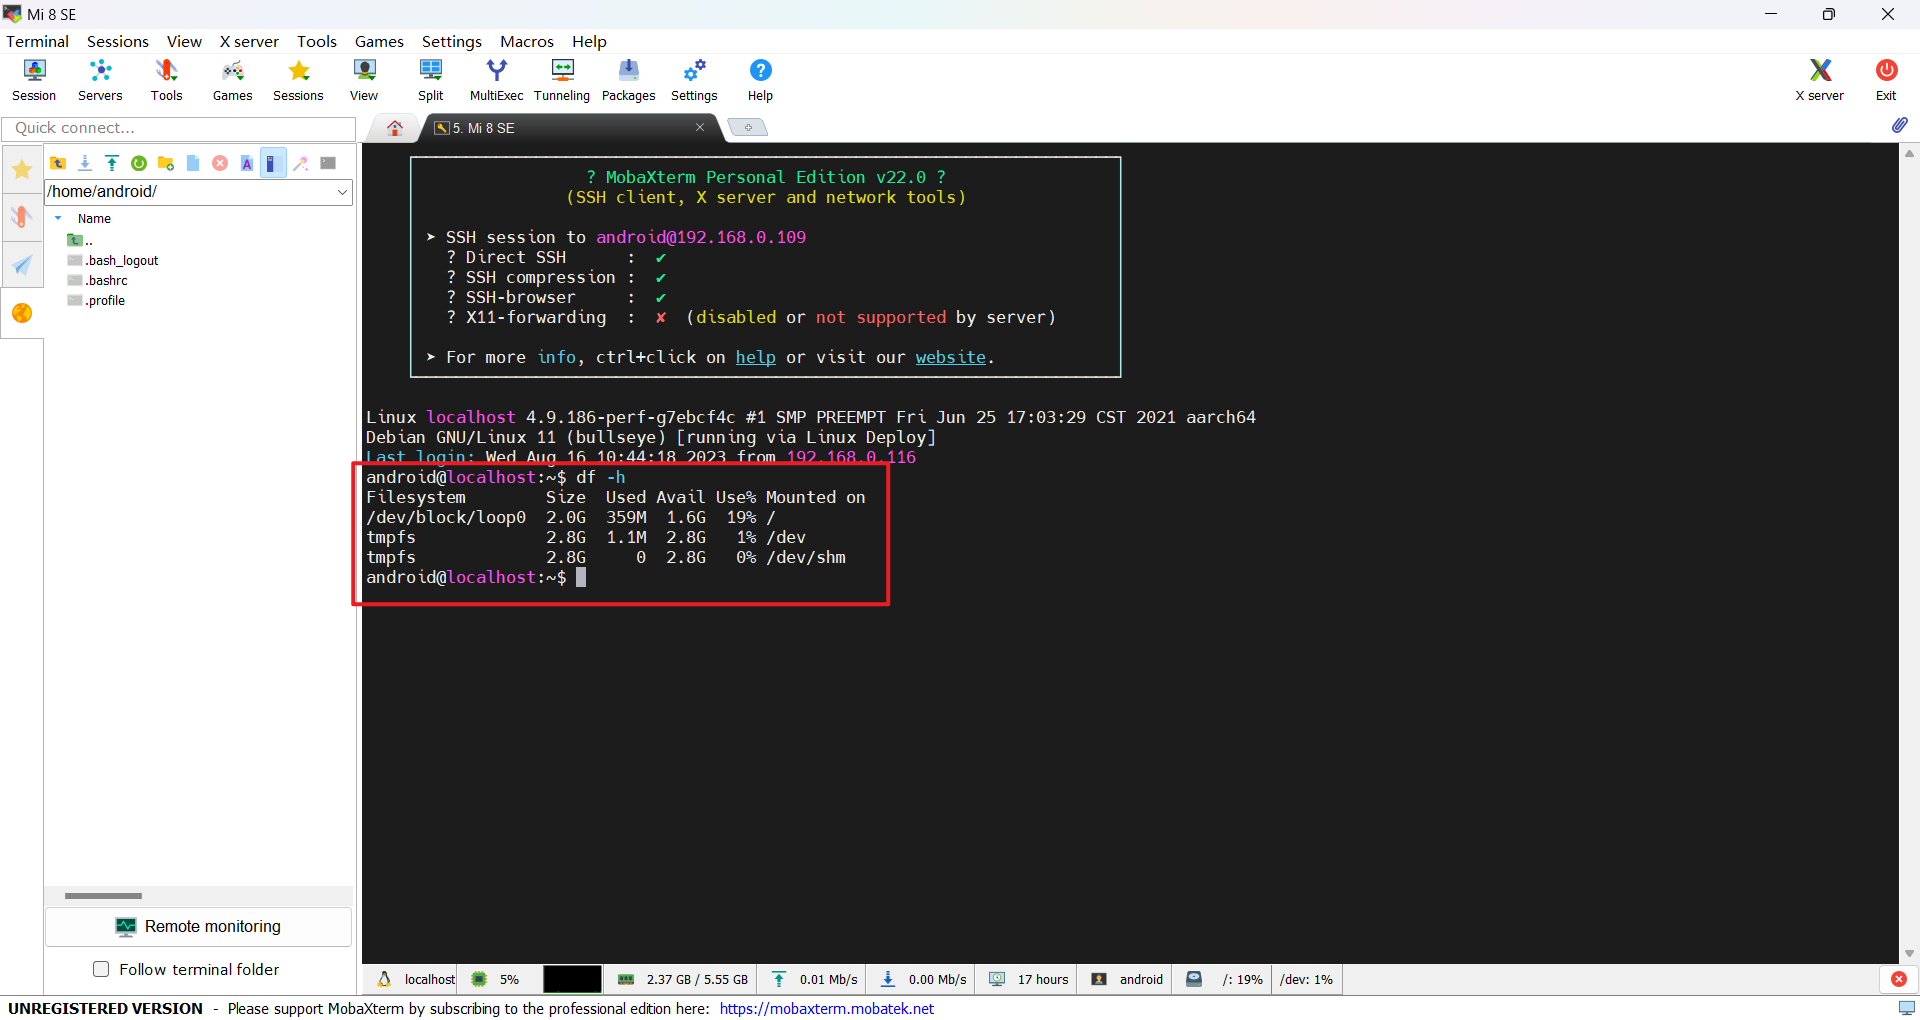
在 Linux 安装过程中,若安装类型选择 镜像文件 则可能临 磁盘存储空间不足 的问题,使用 df -h 查看当前磁盘使用情况
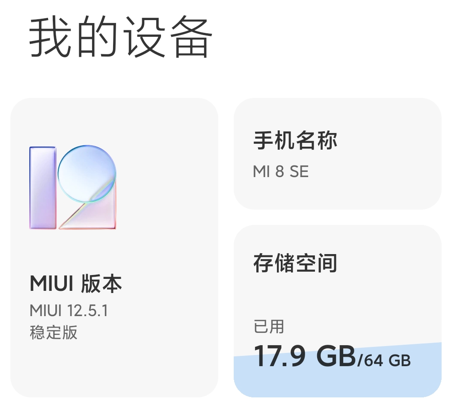
笔者使用的 Mi 8 SE 总存储空间为 64GB,计划再分出 30GB 给 Linux 系统
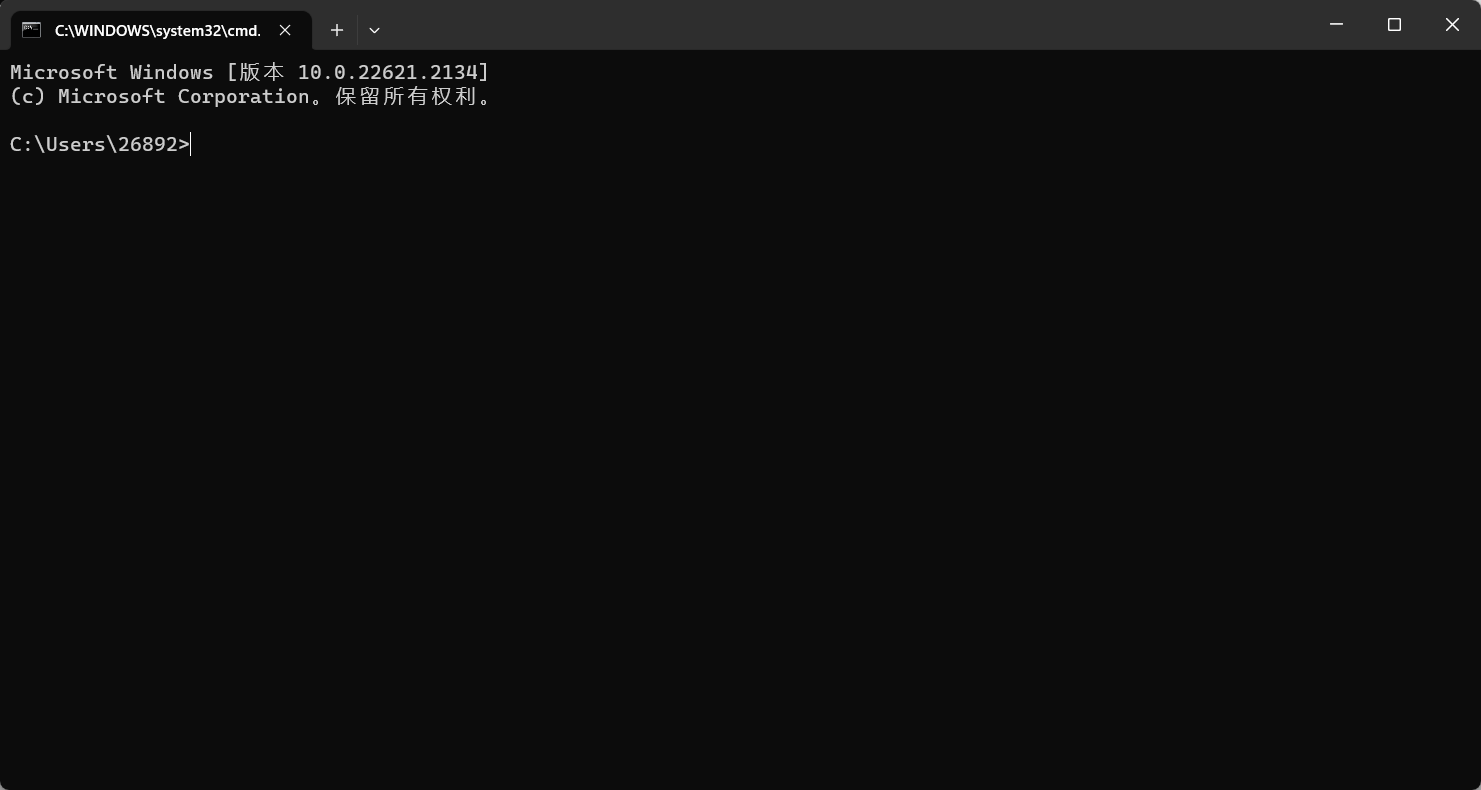
首先打开命令行,win + r > cmd > 回车
使用 usb 线连接手机和电脑,查看已连接设备
1 | adb devices |
在 Linux Deploy 中停止 Linux 镜像, 使用 adb 连接手机终端
1 | adb shell |
扩容 Linux 镜像文件,追加容量越大需要的时间越久
1 | # bs 块大小(1048576 = 1024 * 1024 Byte = 1 MB) |
修复磁盘文件
1 | # 提权 |
调整 ext2/ext3/ext4 文件系统大小
1 | resize2fs <linux_image_path> |
启动镜像,查看扩容结果
若想释放空间可直接删除 linux 镜像文件,然后重启手机即可
问题收集
Linux Deploy 安装/使用时可能遇到的问题及解决方案如下,欢迎补充
| 问题类型 | 具体描述 | 解决方案 |
|---|---|---|
| 安装 | failure while comfiguring required packages… | 在引导配置中修改发行版 GNU/Linux 版本;更换源地址 |
| The container is already mounted | 先点击停止再继续安装 | |
| 运行 | * | * |
参考文章